Bill of Rights Lapbook: A Fun, Hands-On Activity for Kids
Just so you know, this post contains affiliate links. That means if you use them to make a purchase, I may earn a commission. You can read my full affiliate disclosure HERE.
Looking for a fun way to teach your kids about the Bill of Rights? If you’re studying American history or government in your homeschool, this printable Bill of Rights lapbook is a great hands-on activity to help your kids learn about the first ten amendments to the U.S. Constitution!
I love finding ways to make history a little more interactive, especially when we’re learning about important concepts that can sometimes be difficult for younger kids to understand.
And while reading about the Constitution is certainly important, I think there’s something to be said for giving kids an opportunity to actually do something with what they’re learning.
That’s where lapbooks come in!
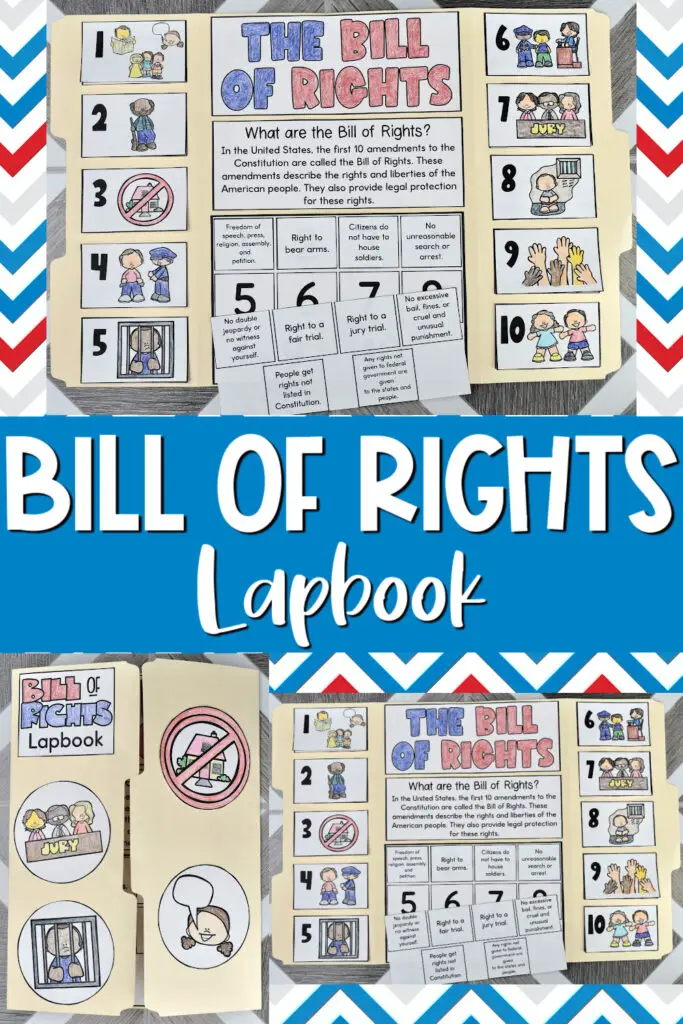
This printable Bill of Rights lapbook can help kids learn about the ten amendments through coloring, cutting, matching, and assembling their very own project. And when they’re finished, they’ll have something they can keep and refer back to as they review what they’ve learned!
What Is the Bill of Rights?
Before putting together your lapbook, it’s helpful to spend a little time talking about what the Bill of Rights actually is and why it’s important.
The Bill of Rights is the name given to the first ten amendments to the United States Constitution. These amendments were ratified in 1791 and protect important freedoms and rights, including freedom of speech, freedom of religion, and the right to a fair trial.
Understanding the Bill of Rights is an important part of learning about American government and how our country was founded.
But let’s face it, some of these concepts can be a little abstract for elementary-aged kids!
That’s why I love using activities that help break down information into smaller, more manageable pieces.
With this lapbook, your kids will have the opportunity to explore each of the ten amendments and learn a simple explanation of what it means.
What’s Included in the Bill of Rights Lapbook Printable?
This printable lapbook includes everything you need to create an interactive Bill of Rights project with your kids (you’ll just need a few basic supplies to put it all together).
Here’s what you’ll find inside:
1. Step-by-Step Instructions
I’ve included an instruction page that walks you through how to assemble the lapbook.
You’ll learn where to place the different pieces, how to put together the lift-the-flap cards, and how to arrange everything inside your file folder.
2. Printable Cover Art
There are two pages of cover art that your kids can color, cut out, and use to decorate their lapbook.
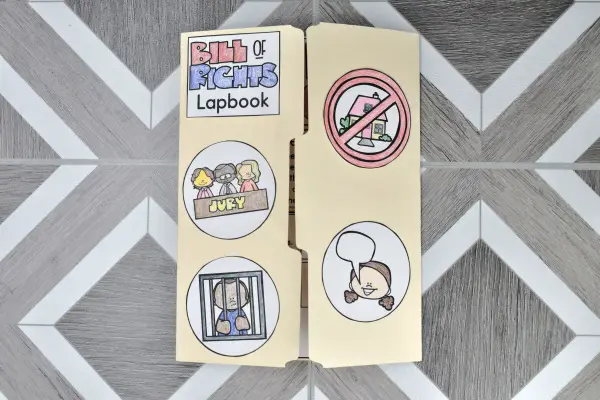
They can mix and match the illustrations and choose how they’d like to arrange everything on the front.
3. Bill of Rights Lift-the-Flap Cards
One of my favorite parts of this activity is the set of lift-the-flap cards!
Each of the ten amendments has a numbered card with a corresponding illustration. Underneath the flap, kids will find a short, kid-friendly explanation of the amendment.
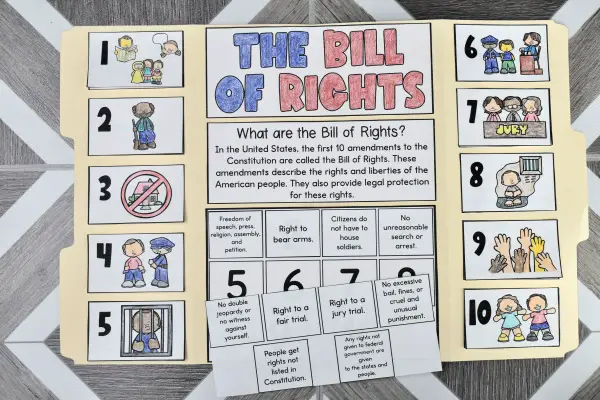
These cards are arranged along the inside flaps of the file folder, making it easy for kids to lift each one and review what they’ve learned.
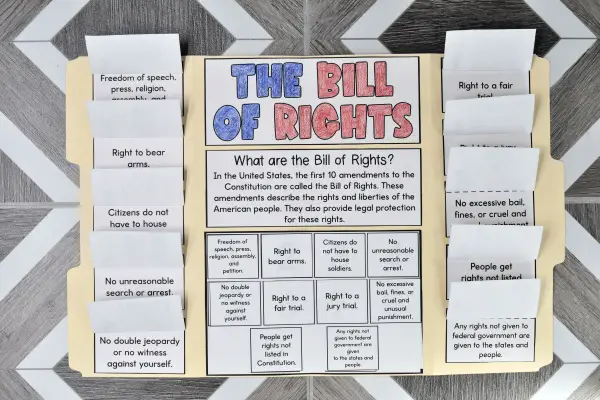
The illustrations also provide a helpful visual reminder of each amendment.
4. Bill of Rights Matching Activity
The center of the lapbook includes a sequencing and matching activity.
Your kids will match a short description of each amendment to its correct number, from 1 through 10.
You can have them glue the answers directly onto the lapbook once they’ve matched everything correctly.
Or, if you’d rather make this a reusable activity, you can keep the cards loose in a small envelope and have your kids practice matching them again later!
This is a great way to review the amendments and check how well your kids understand what they’ve learned.
How to Make Your Bill of Rights Lapbook
Putting together this lapbook is pretty simple, and you probably already have most of the supplies you need at home!
Supplies you’ll need:
- Printed Bill of Rights lapbook pages
- A standard-sized file folder
- Scissors
- Glue
- Crayons, colored pencils, or markers
Step 1: Prepare your file folder.
Start with a standard-sized file folder. Fold the outside edges inward so that they meet in the center, creating two flaps that open like doors.
This will be the base of your lapbook!
Step 2: Color and decorate the cover.
Have your kids color the cover illustrations and cut them out.
They can arrange the pictures however they’d like on the outside of their folder and glue them into place.
Step 3: Add the Bill of Rights information.
Open the folder and glue the large “The Bill of Rights” title at the top of the center section.
Underneath, add the printable explanation of what the Bill of Rights is.
Step 4: Assemble the lift-the-flap cards.
Next, have your kids color and cut out the ten numbered amendment cards and their corresponding explanations.
Glue the explanation cards underneath the numbered illustrations, leaving the flaps free to lift.
Arrange amendments 1–5 on the left side of the lapbook and amendments 6–10 on the right side.
Step 5: Complete the matching activity.
Finally, glue the numbered matching grid into the bottom center of the lapbook.
Cut out the ten amendment description cards and have your kids match each one to its correct number.
Once they’re finished, they can glue the cards in place or save them for future review.
And that’s it! Your kids will have their very own Bill of Rights lapbook!
Ways to Use This Bill of Rights Activity in Your Homeschool
One thing I love about lapbooks is that they’re flexible. You can use them as part of a larger history unit, or as a standalone activity when you’re introducing a particular topic.
Here are a few ways you might incorporate this Bill of Rights lapbook into your homeschool:
As part of your American history curriculum: If you’re studying the founding of the United States, the Constitution, or early American government, this lapbook makes a great supplemental activity.
During a government or civics lesson: Use the lapbook to introduce your kids to the first ten amendments and discuss why these rights matter.
As a review activity: If your kids have already learned about the Bill of Rights, have them complete the matching activity without looking at the answers first. It’s a simple way to see what they remember!
As a project to display: One of the fun things about lapbooks is that kids have a finished project they’re often proud to show off. They can share what they’ve learned with Dad, grandparents, or siblings.
You could even spread this activity over several homeschool days, learning about a few amendments at a time before assembling the completed lapbook.
And don’t forget to spend some time discussing the amendments together! The printable explanations are intentionally simple, so they’re a good starting point for conversations and further learning.
Grab Your Printable Bill of Rights Lapbook!
If you’re looking for a simple, hands-on way to teach your kids about the Bill of Rights, I hope you’ll give this lapbook a try!
It’s a fun way to make learning about the Constitution a little more interactive, and your kids will have a completed project they can use to review the ten amendments.
I hope this activity is a blessing to your homeschool and helps your kids develop a better understanding of the rights and freedoms outlined in our Constitution!